With the introduction of the Solo Max waste kit, this guide has been updated to version 2.0 and is also hosted on the Printer Potty site.

Note: The original guide (below) includes a couple of variations that are no longer documented in the new guide so it is still a useful reference if you’re looking at alternative installation approaches.


Note: This guide also covers the following Epson printer models:

Artisan 1430
Photo 1500

…and many of the panel release procedures are mirrored in the R1900, R2000, R2880, B1100, Workforce 1100, and T1100 models.

Note: This guide is copyright of OctoInkjet Ltd.

Accessing the Waste Tube

Remove front panel stage #1

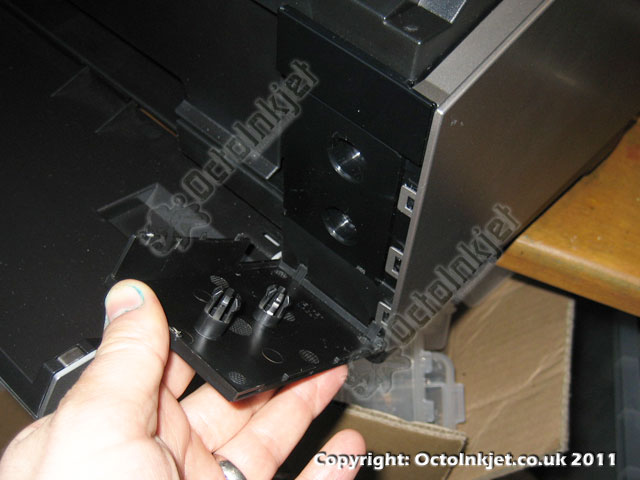
Removing Front Panel

Ultimately you want to remove the side panel to access the waste tubes but there are two stages to tackle before you can do this.

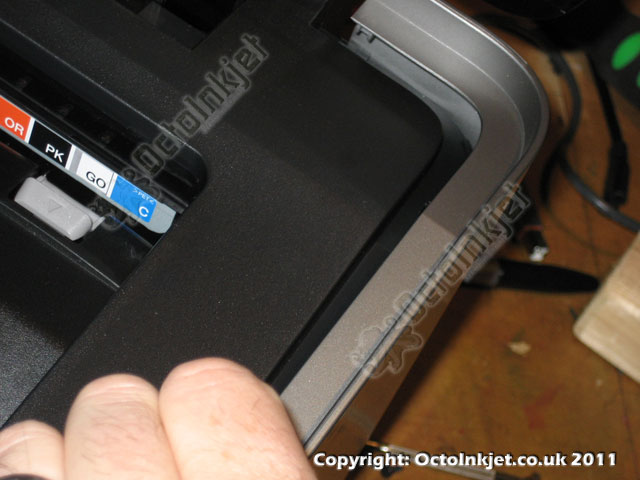
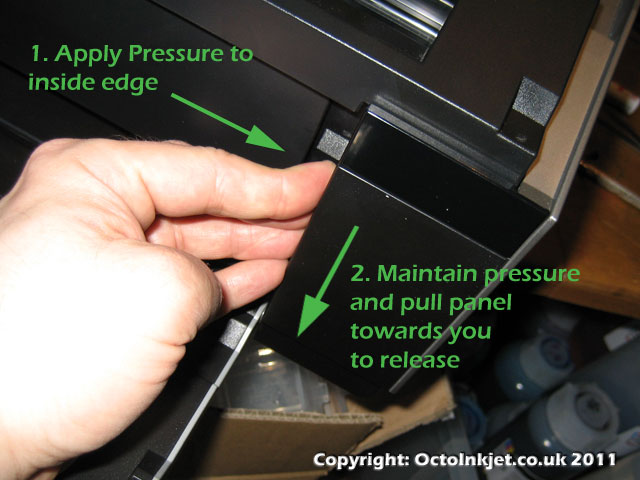
The first is the right side front panel which can be released by:

  • Applying pressure to the inside edge
  • While maintaining pressure easing the panel forward
  • Once the internal tabs have released their hold, ease the panel top forward
  • Now lift the panel forward, up and out and put somewhere safe.
Gently ease top of panel out and forward to remove
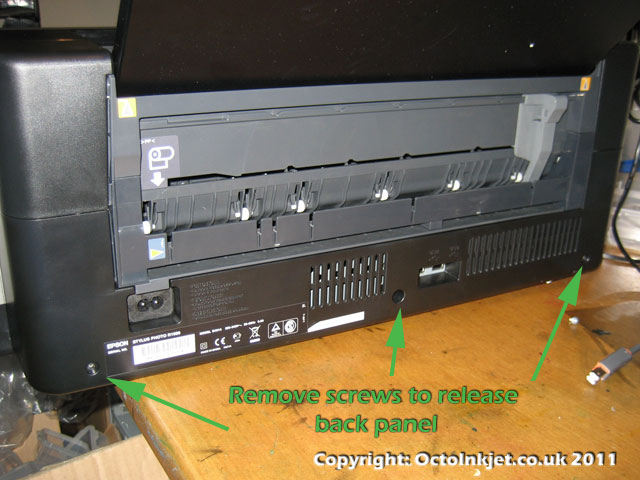
Remove the screws in the back plate

Release Back Panel

The back panel also holds the side panel in position so you will need to release this enough to free the side panel.

To complete this step you need to:

  • Remove the screws indicated (See 3. left)
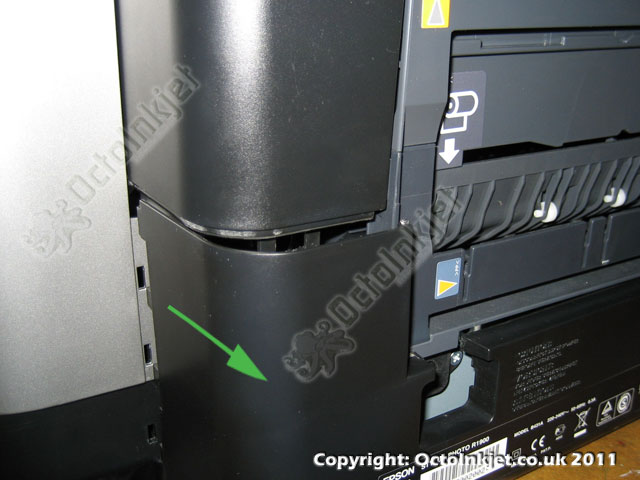
  • Gently ease the left* side of the panel back so the tabs are free from the side panel  (See 4. left)
    Note: You do not need to completely remove the back panel.

* “left” when as seen from back of printer

Release the back plate so the tabs are out at the left (from back) side
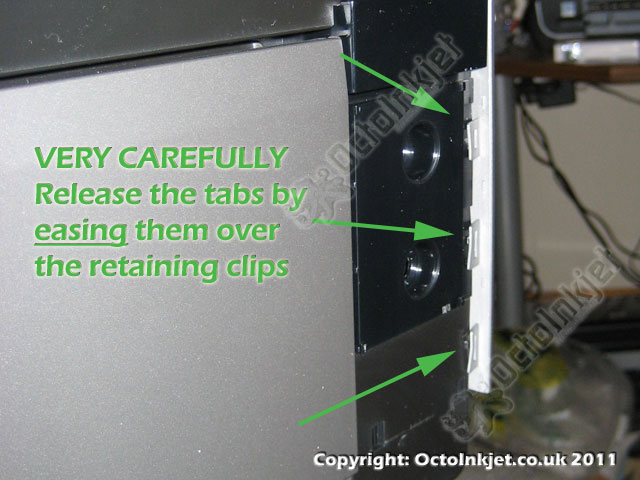
Release the front tabs

Release Side Panel

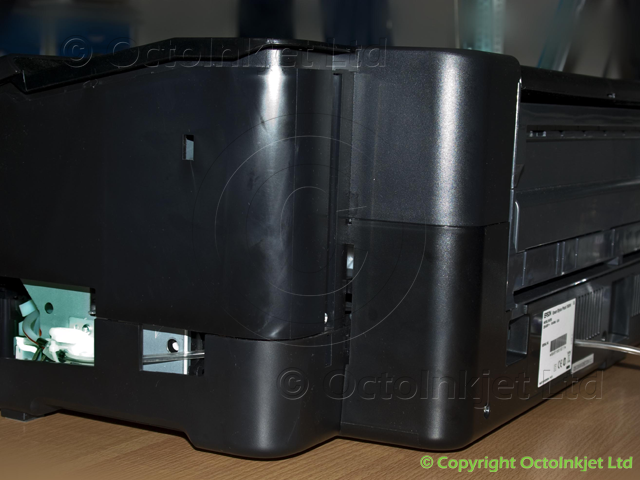
This part of the operation is the trickiest due to the fragile nature of the tabs holding the front edge of the side panel to the case.

A few things to note:

  1. The panel releases UPWARDS
  2. There are internal tabs that cannot be reached
  3. Patience is required or you’re going to regret it

So, to complete the panel removal you need to:

  • VERY gently apply some upward pressure to the top inside edge (See 6. left)
  • Use a flat edge (eg: watchmaker screwdriver) to gently ease the front tabs forwards and off the bottom of the retaining lugs. (See 5. left)
  • Once the tabs are released you should feel the panel start to pull free so gently encourage this up and out.
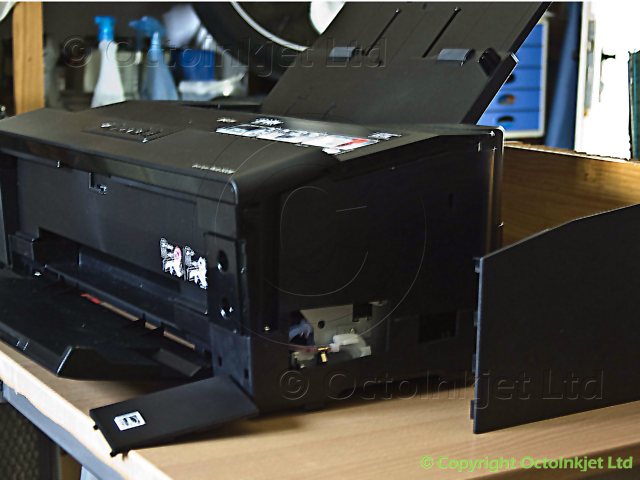
Gently lift the side panel (watch the front!) to release internal tabs
Photo 1500 - waste tube exposed

Accessing and Releasing the Waste Tube

Once the side panel has been released and removed it’s well worth taking a break as you’re past the really nasty bit.

When you’re ready you should now see the waste tubes (as per 7. left).

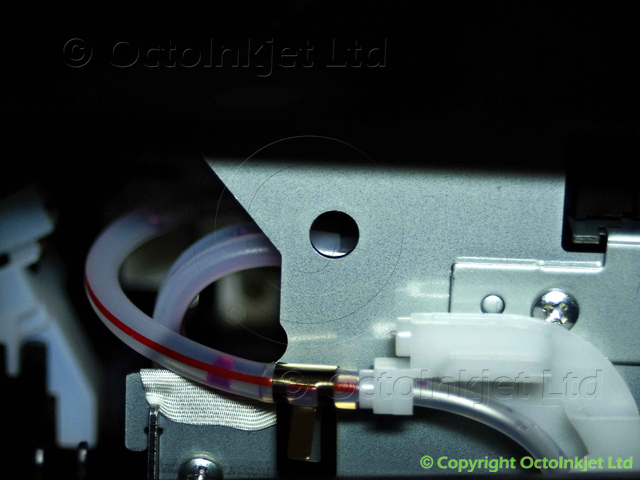
You will need to release the flexible grey tubes from their mount points and these will then be connected to your tube extensions later.

To release:

  1. Press the two scissor like ends of the wire clamps together and slide towards the front of the printer
  2. Carefully pull the grey tube towards the front of the printer off the clear extension tube
  3. Repeat for the second tube.

IMPORTANT: Take your time with this stage and work the tubes free carefully!

Photo 1500 - waste tube close-up

Fitting the Waste Tube extension

This section is split into two as there are two different approaches to extending the waste tube out of your printer.

Option #1 – No Drilling
A non-destructive approach which routes the tube internally to exit through a vent grill in the rear of the printer.

Option #2 – Drill/Modify case
An approach for those who prefer greater flexibility on waste tank placement and not concerned about modifying the printer case (ie: drilling holes in it)

Option #1 – No Drilling Approaches

photo_1500-nd1-best-no-drill.png

“Leave Side off” Approach

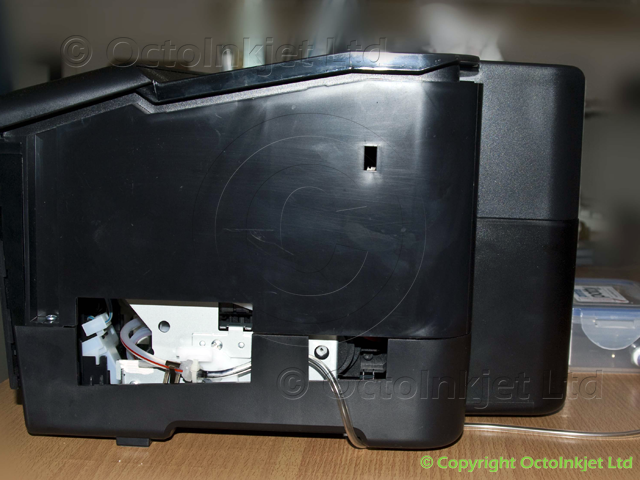
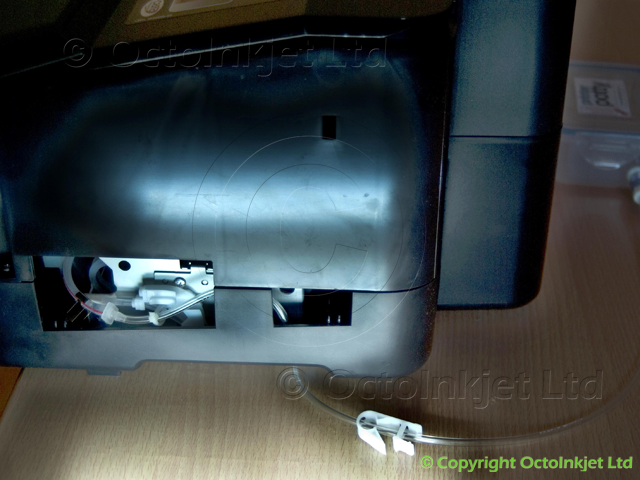
This is the simplest approach for anyone who isn’t bothered about the aesthetics of their printer and happy to leave the printer side panel off..

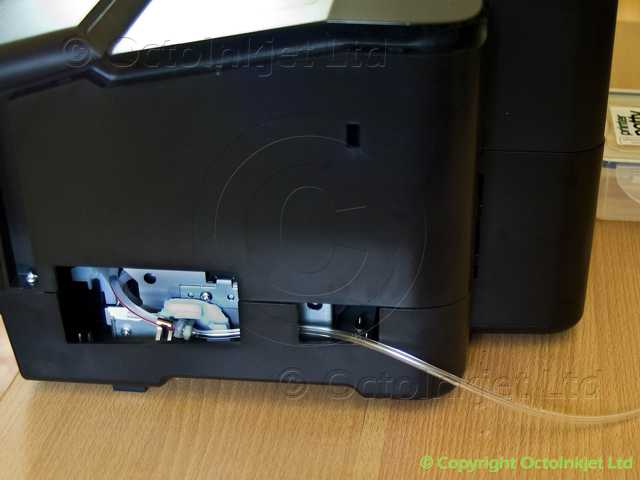
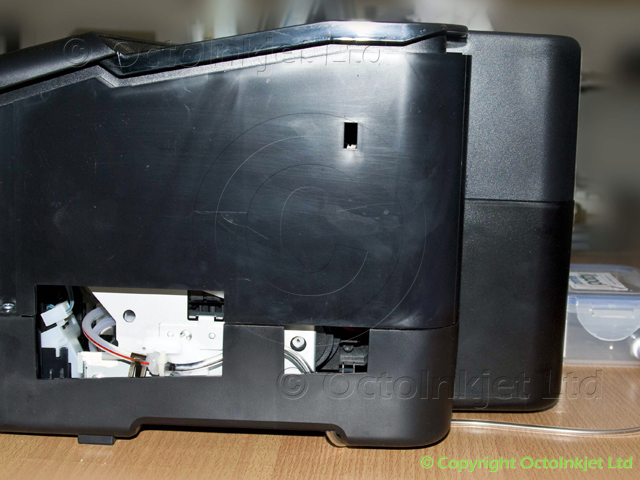
Simply extend the tube out of the printer as shown…

The image (left/below) shows how the tube can be routed under the printer to the back to keep it out of the way of any items near the printer side.

Photo 1500 - tidying tube routing
…or…
Photo 1500 - Drill free tube routing

“Route Through Vent” Approach

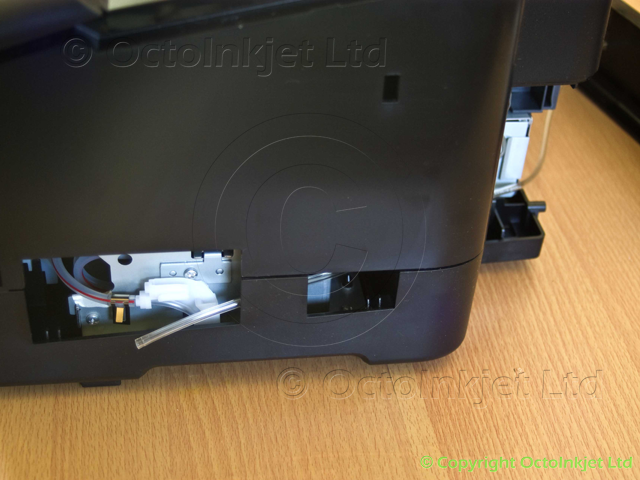
This approach routes the extension waste tube within the printer case to exit via the vent grill in the rear.

IMPORTANT:
Care is required to ensure the tube is not crimped or otherwise as this would cause problems with ink flow to the waste kit.

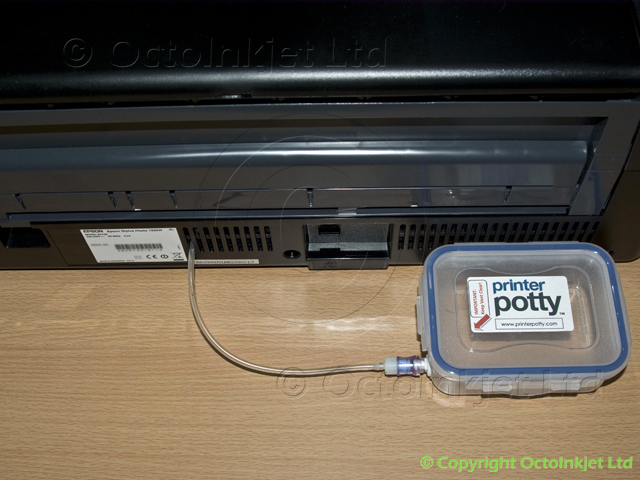
Photo 1500 - tube routed through grill

Tube Routed Through Vent/Grill

The tube should be routed (as shown in Images 11, 12 left) through the case towards the rear, ensuring a clear path.

Photo 1500 - Panels replaced

Panels Replaced

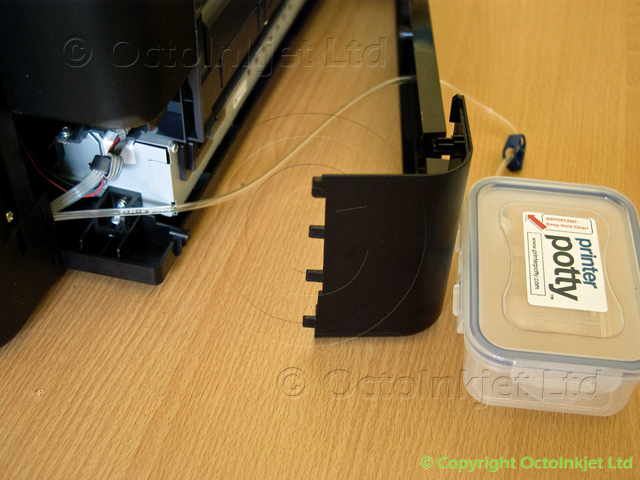
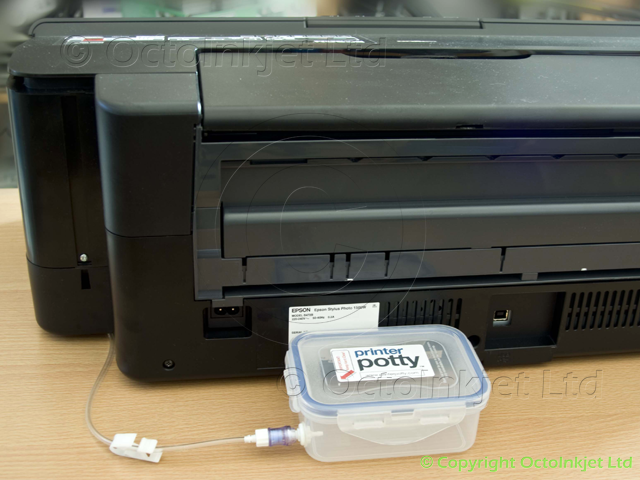
This approach allows replacement of the rear (and side) panel(s) but as already noted you need to ensure the tube path is clear and ink is flowing properly.

Few things to remember when securing the tubes:

  1. Make sure the tube does not fold or kink at any point
  2. Make sure any attachments do not flatten the tubing
  3. Make sure the tube will not be flattened, kinked or folded when the side panel is replaced
Photo 1500 - tube routed through grill finished

Finished (No-Drill through the Grill)

Image 14 (left) shows the finished installation for the grill routed extension tube.


Option #2 – Drill/Modify Case

Photo 1500 - Drill exit hole

Drill and Route Tube

The suggested placement shown (Image 15 left) is just an option. You could drill to the rear of the printer but obviously you need to ensure the exit point is not covered by any mounting points, electronics or other internal parts.

IMPORTANT:
Modifying your printer in this way will almost certainly invalidate any warranty you have so consider the alternative options above if this is a concern for you.

Photo 1500 - tidying tube routing

Tube Routing

Assuming you have drilled as shown you can route the tube (Image 16 left) to the rear by running it under and around/behind the “foot” to keep things tidy.

Any tube routing needs follow these rules however:

  1. Make sure the tube does not fold or kink at any point
  2. Make sure any attachments do not flatten the tubing
  3. Make sure the tube will not be flattened, kinked or folded when the side panel is replaced
Photo 1500 - drill route finished

Finished

Image 17 (left) shows the finished installation assuming the routing above…


Resetting the Waste Ink Counter

Both the Photo 1500W and Artisan 1430 require the WICReset or iWIC (for MacOS)  utility(key purchase required).

If needed you can get the reset key and kit as a single bundle (Solo Max bundle) or just the Solo Max kit on its own.


Note: The most up to date information on reset utilities will be available via the QuickFind tool.

Leave a Reply

This site uses Akismet to reduce spam. Learn how your comment data is processed.